Lesson 4 - Installing Ubuntu Server on VirtualBox
27/06/2024 - 4 phút

In today’s technology world, mastering system administration and virtualization skills is incredibly important. Ubuntu Server is one of the most popular server operating systems, widely used in businesses and organizations for its stability, security, and high performance. VirtualBox, a powerful and flexible virtualization tool, allows us to easily create and manage virtual machines for practice and experimentation without affecting the main system.
In this article, we will delve into the detailed process of installing Ubuntu Server on VirtualBox. The article will guide you from preparation, downloading the Ubuntu Server ISO file, creating a virtual machine, to installing the operating system and performing initial configurations. By following this guide, you will understand the installation process thoroughly and be able to build a practice environment or deploy a server for your projects.
1. Download Ubuntu Server ISO
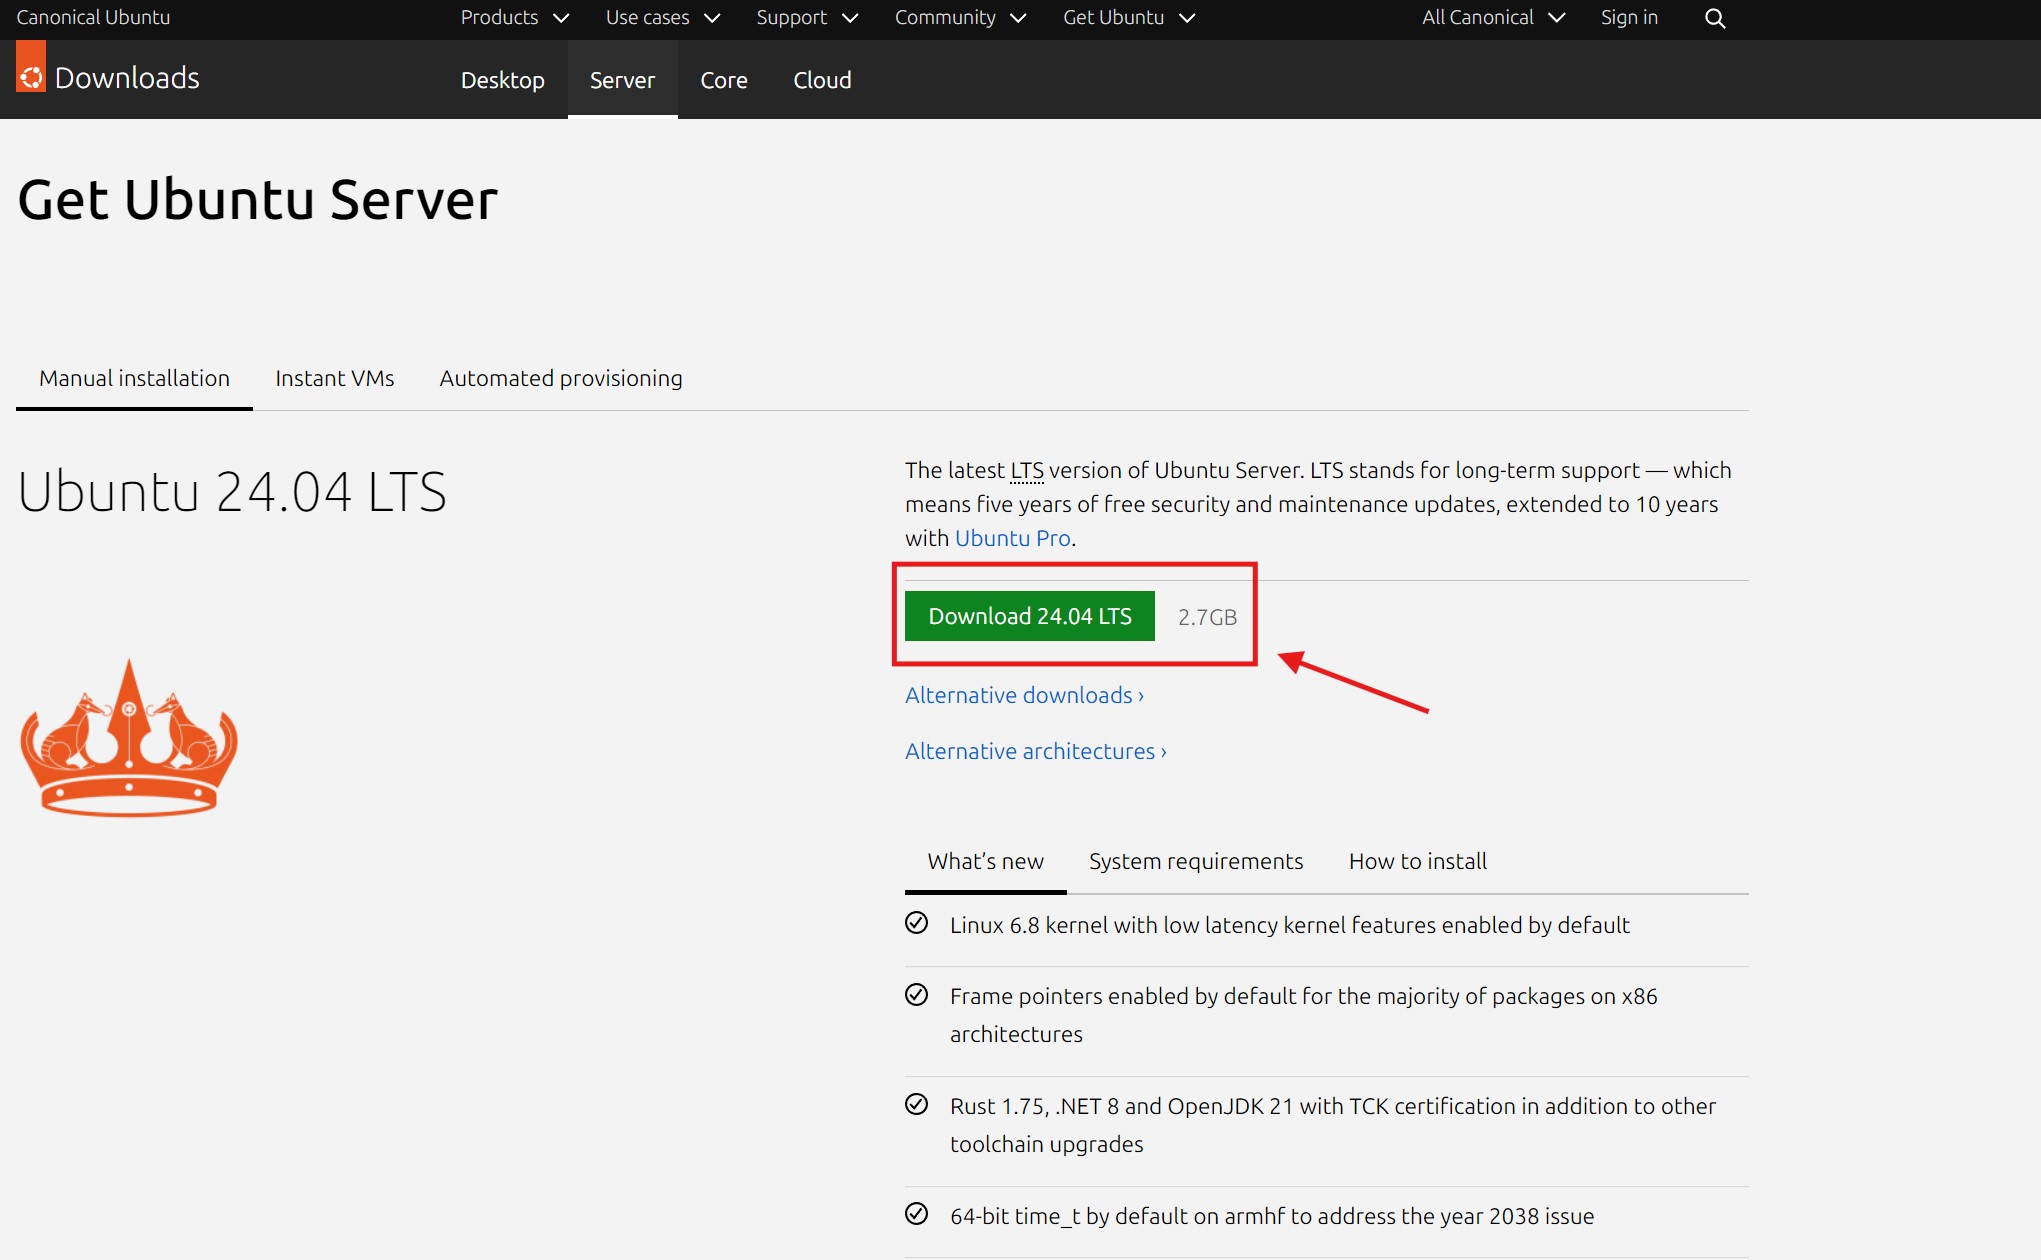
Access the official Ubuntu website to download the latest version of Ubuntu Server:
- Open a web browser and visit Ubuntu Server Downloads.
- Select the latest LTS (Long Term Support) version to ensure stability and long-term support.
- Click the Download button and save the ISO file to your computer.
2. Create a Virtual Machine in VirtualBox
Refer to the article Creating a Virtual Machine in VirtualBox to learn how to create a virtual machine for Ubuntu Server on VirtualBox.
3. Install Ubuntu Server from ISO
Attach the ISO file to the virtual machine:
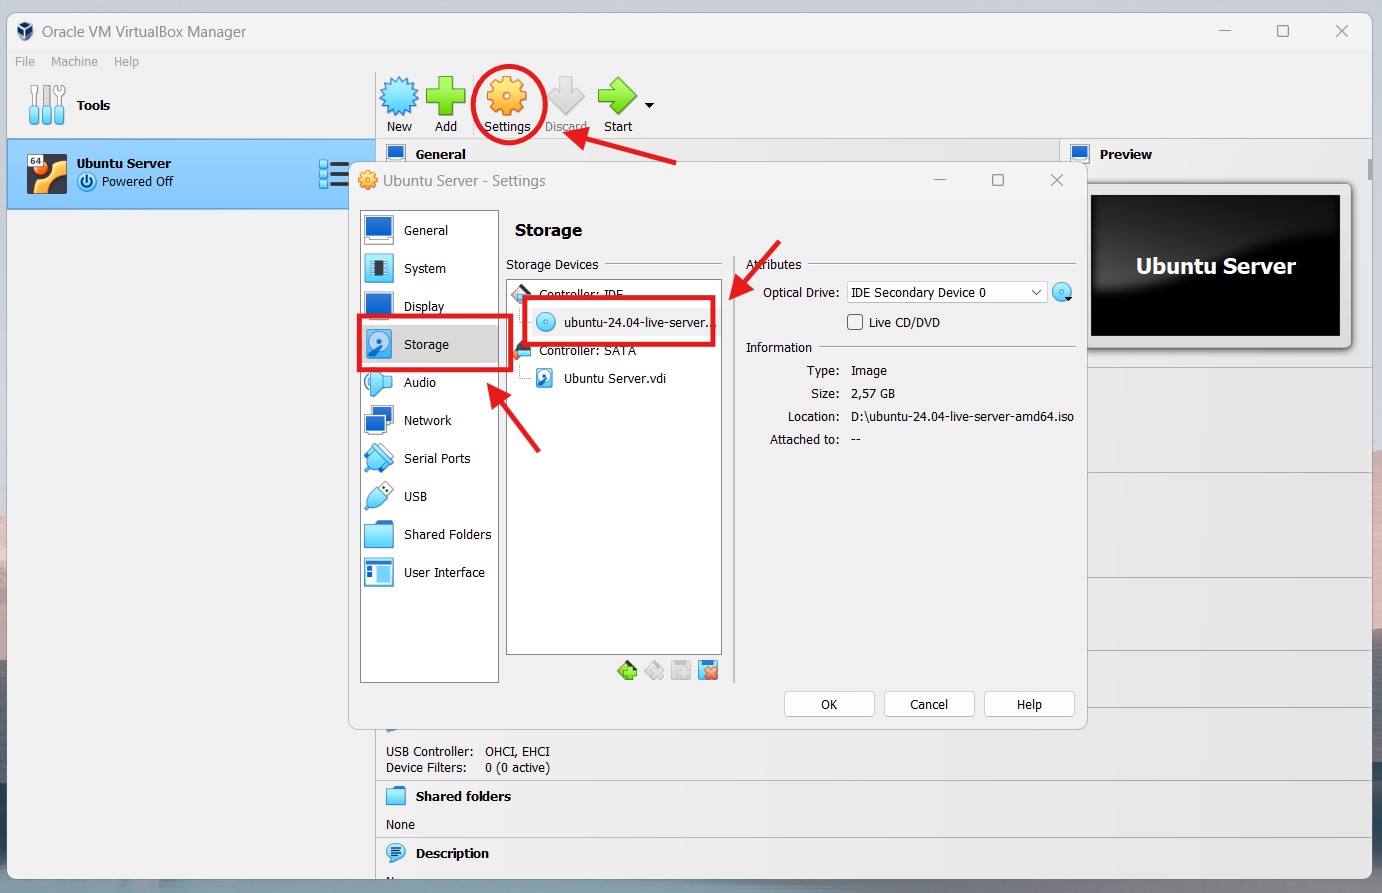
- Open VirtualBox and select the Ubuntu Server virtual machine you created.
- Click Settings.
- In the Storage tab, select Empty under Controller: IDE.
- Click the disk icon on the right and choose Choose a disk file.
- Select the Ubuntu Server ISO file you downloaded and click Open.
- Click OK to save the settings.
Start the virtual machine:
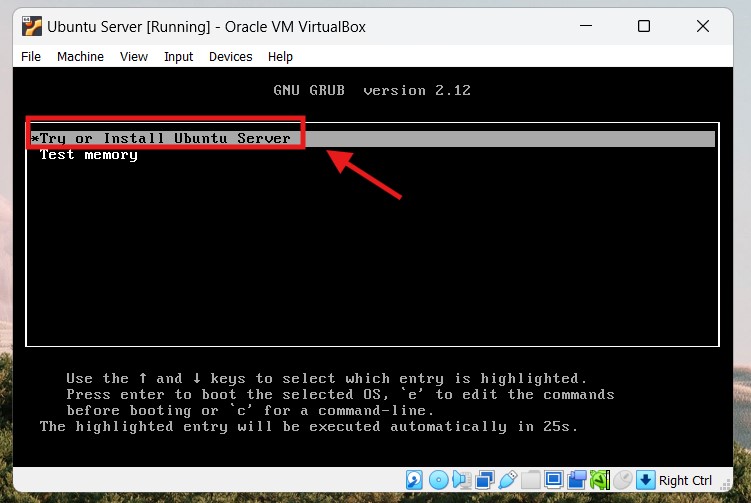
- Select the virtual machine and click Start.
- The virtual machine will boot from the ISO file and display the Ubuntu Server installation menu.
- After the
Install Ubuntu Serverprompt, press Enter to continue.
Proceed with the installation:
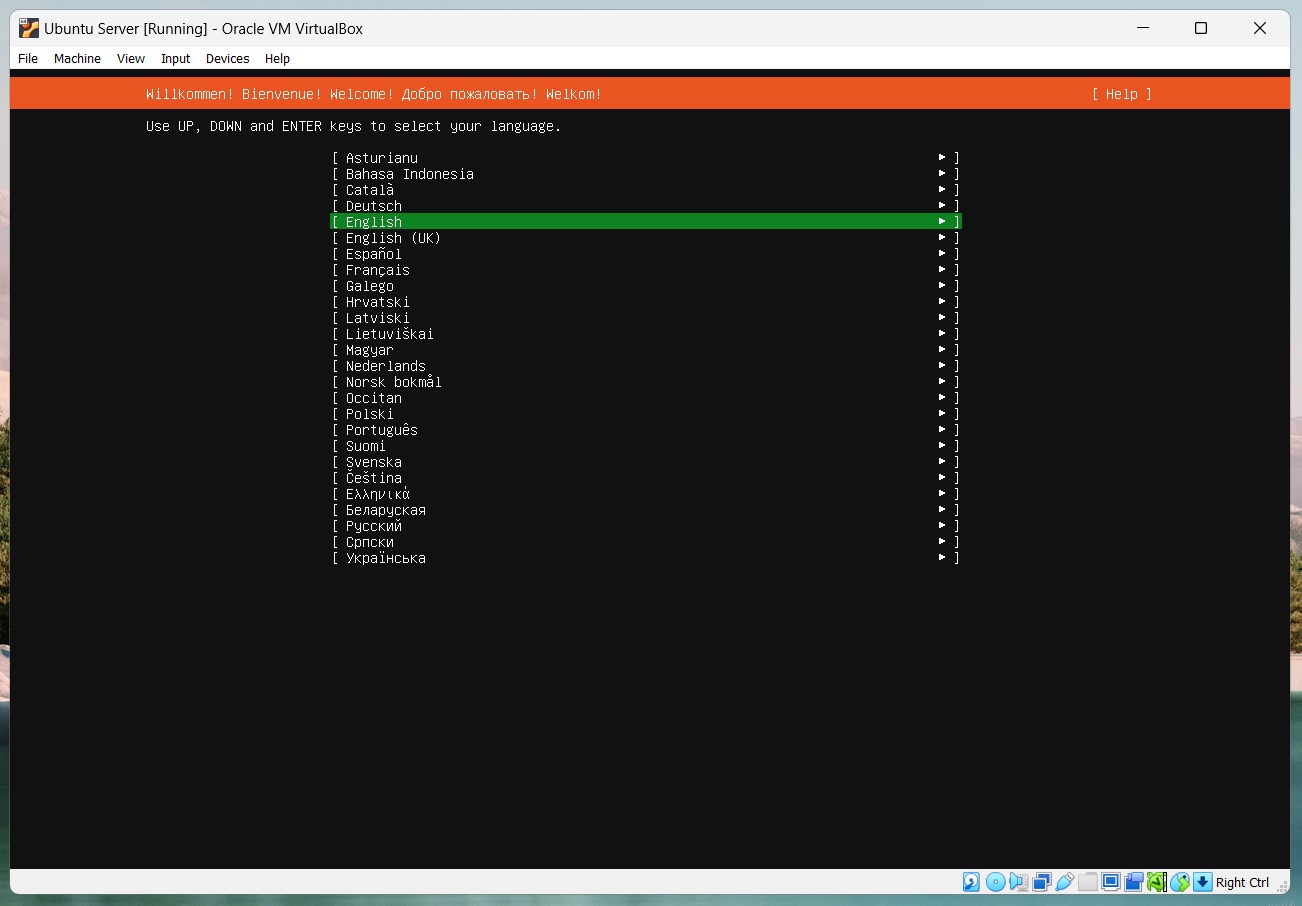
- Choose language: Select the language you want to use during the installation and press Enter. Here, we choose English.
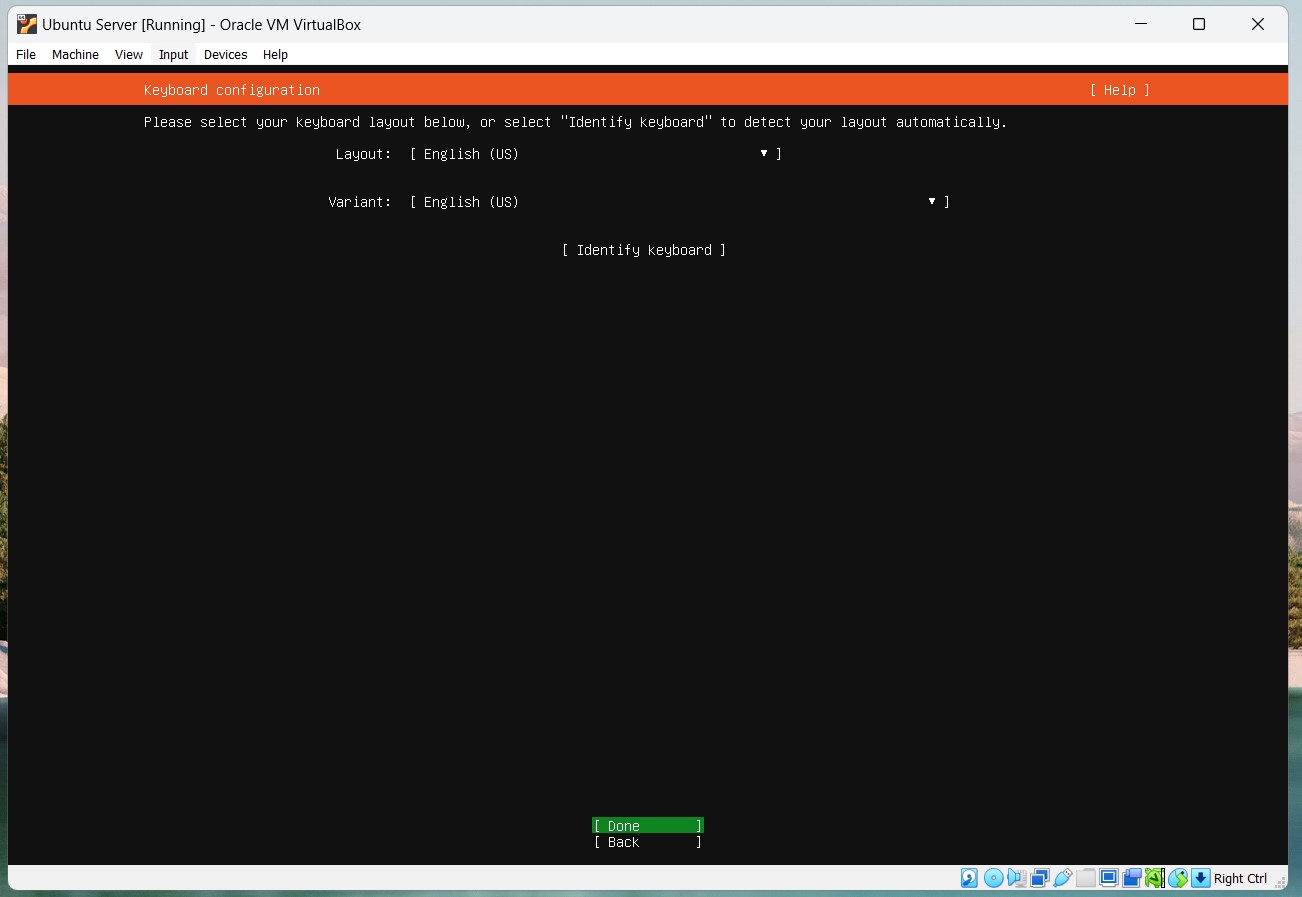
- Select keyboard layout: Choose the appropriate keyboard layout and press Enter. Here, we choose English (US).
- Choose installation type: Select Ubuntu Server and press Enter.
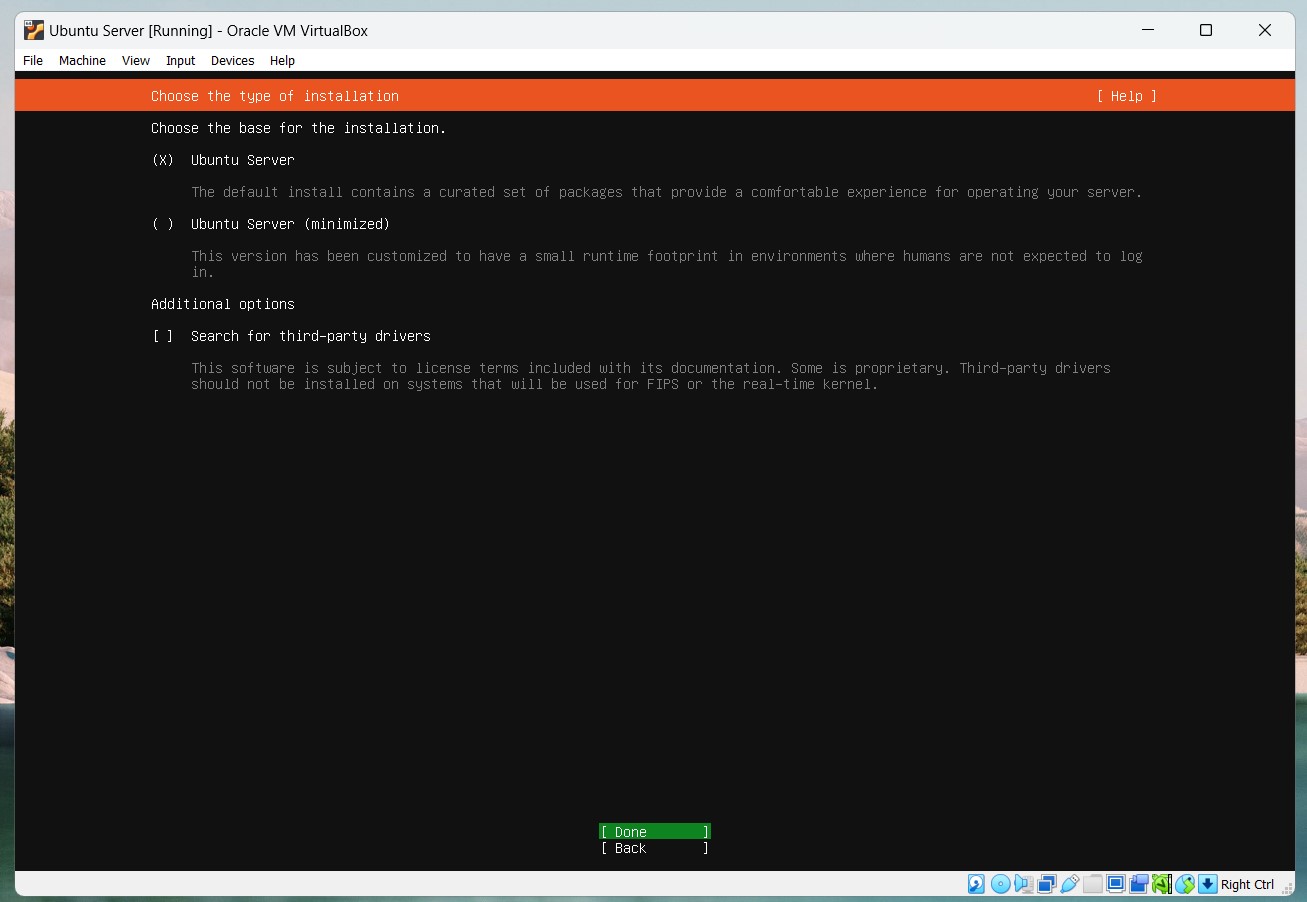 Three Installation Types
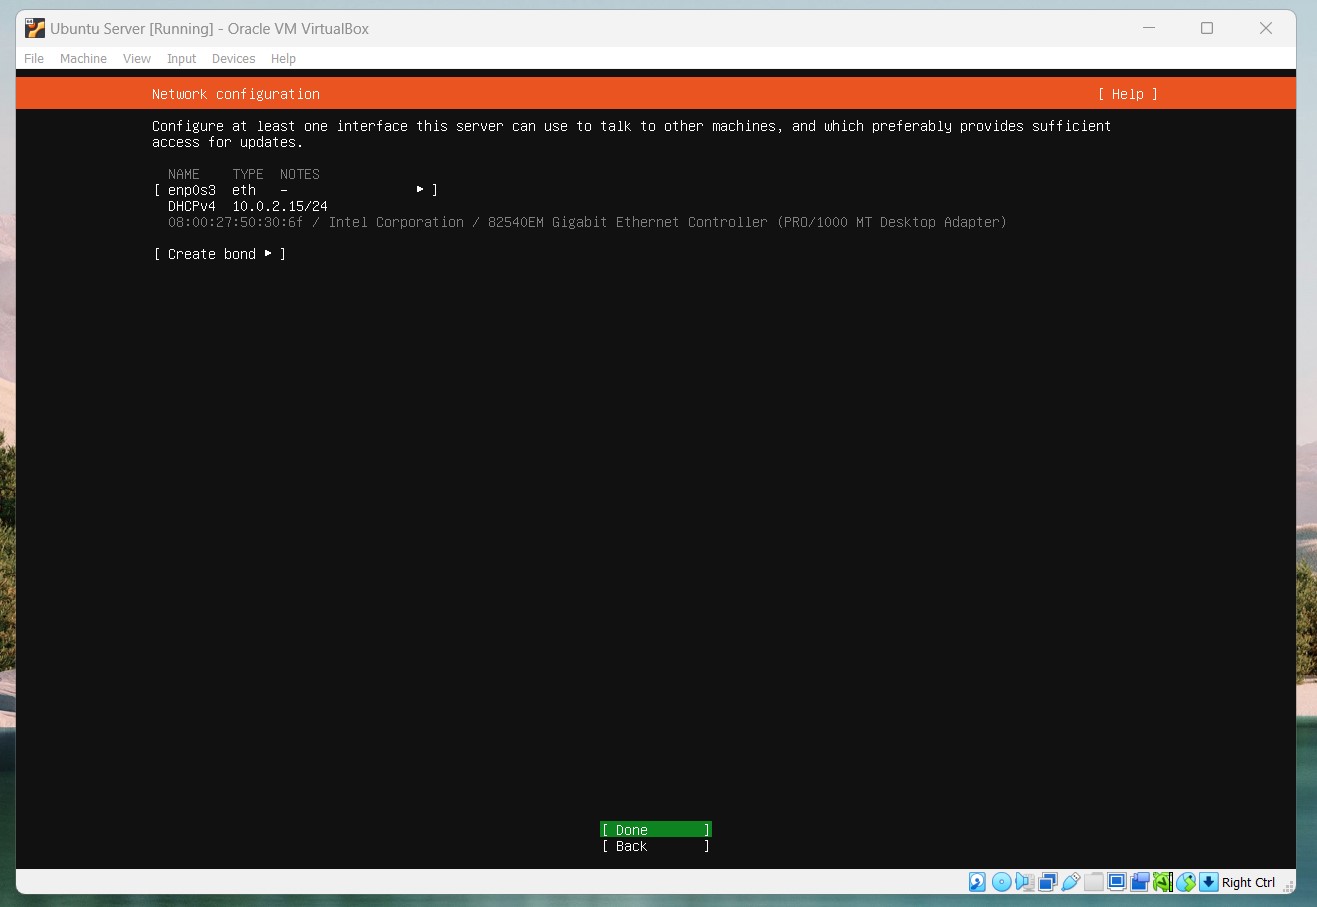
1. Ubuntu Server: Installs the Ubuntu Server operating system with a command-line interface. 2. Ubuntu Server Minimal: Installs a lightweight version of Ubuntu Server with fewer default packages. 3. Additional Options: Installs additional options like OpenSSH, LVM, and other packages. - Configure network: If you are using a wired network connection, the system will automatically detect and configure the network. If not, you need to configure it manually. Here, we choose Done.
- Configure proxy: If you use a proxy to connect to the internet, configure the proxy here. If not, leave it blank and press Enter.
- Update and install packages: Select Yes to update the package list from the Ubuntu repositories, then wait for the update process to complete.
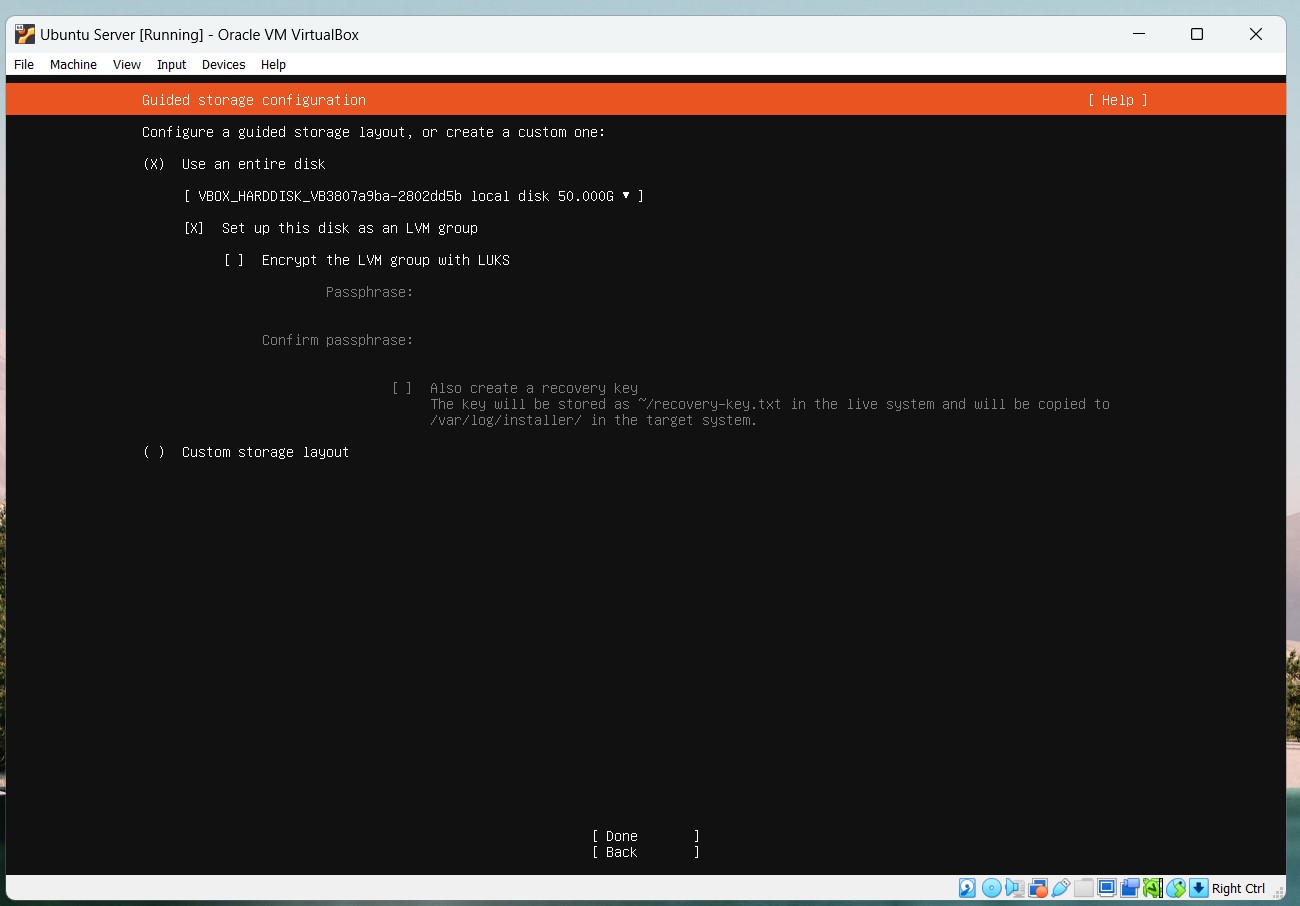
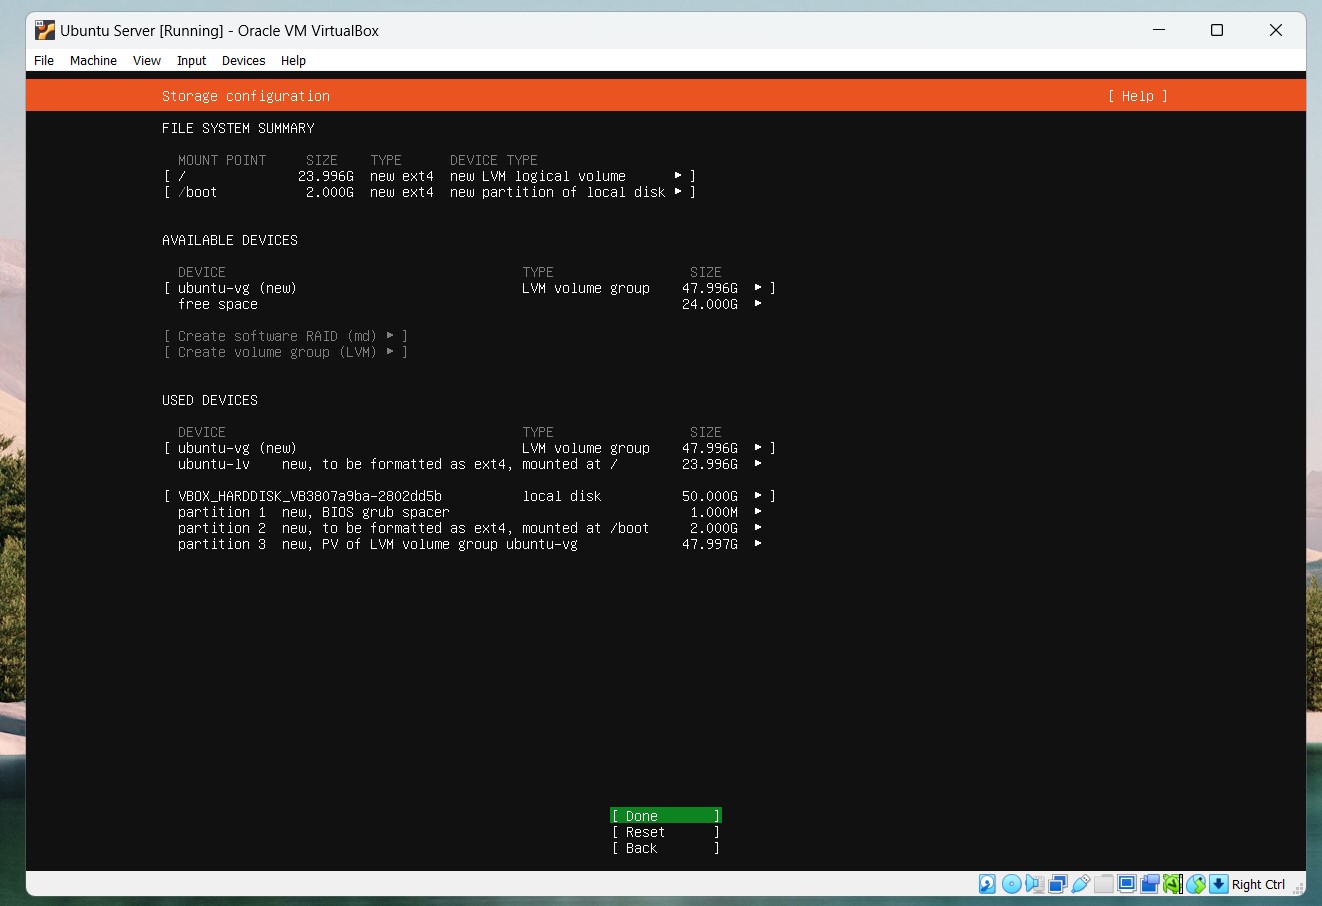
- Select the disk to install: Choose the virtual disk you created and press Enter to confirm the changes. Here, we choose Use an entire disk, then select Continue, and finally choose Done.
- Set server name and user: Enter the server name and the username for the administrative account.Installation Information
 - Your name: Enter your name.
 - Your server's name: Enter the server name.
 - Pick a username: Choose a username for the administrative account.
 - Choose a password: Enter a password for the administrative account.
 - Confirm your password: Re-enter the password to confirm.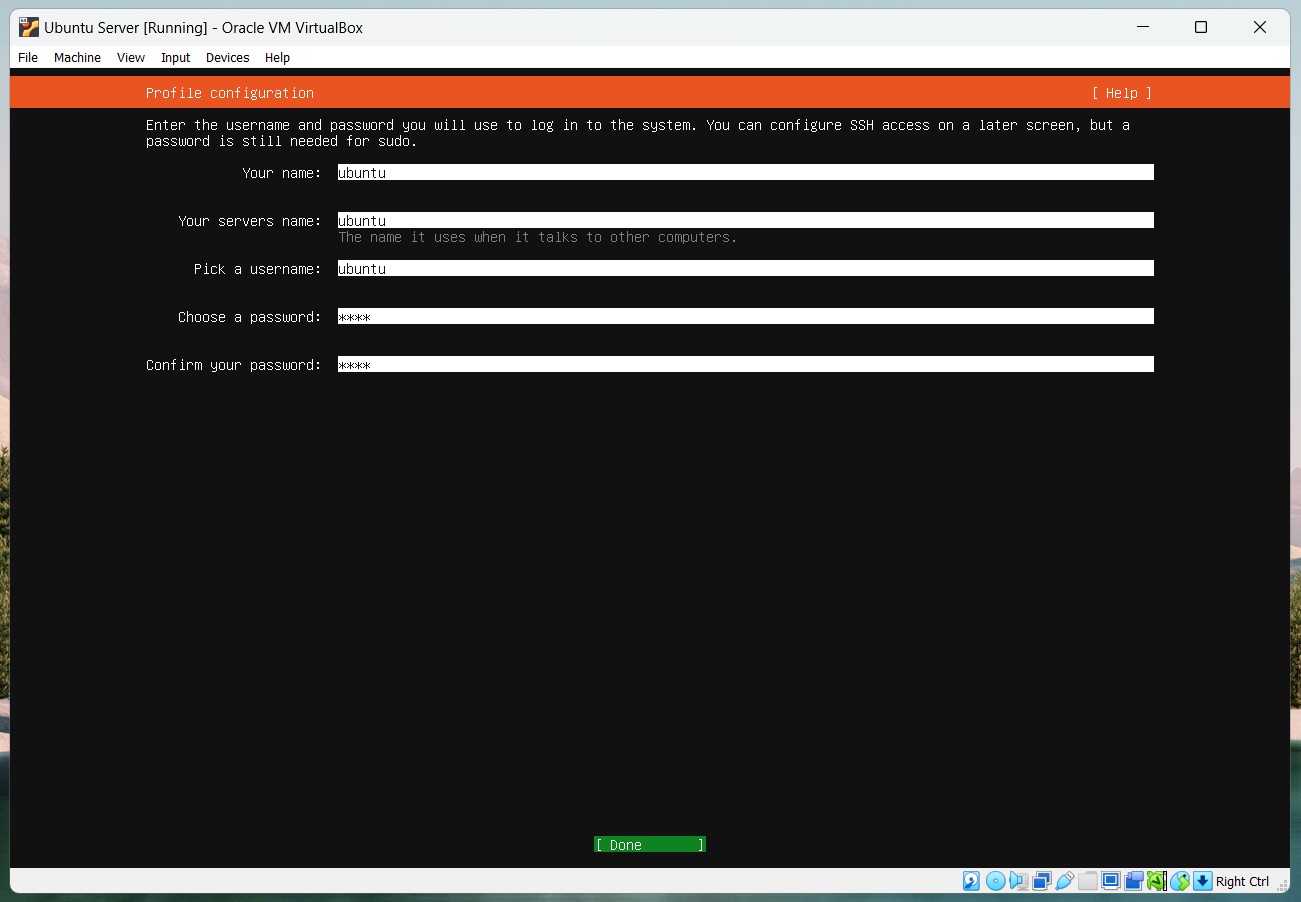
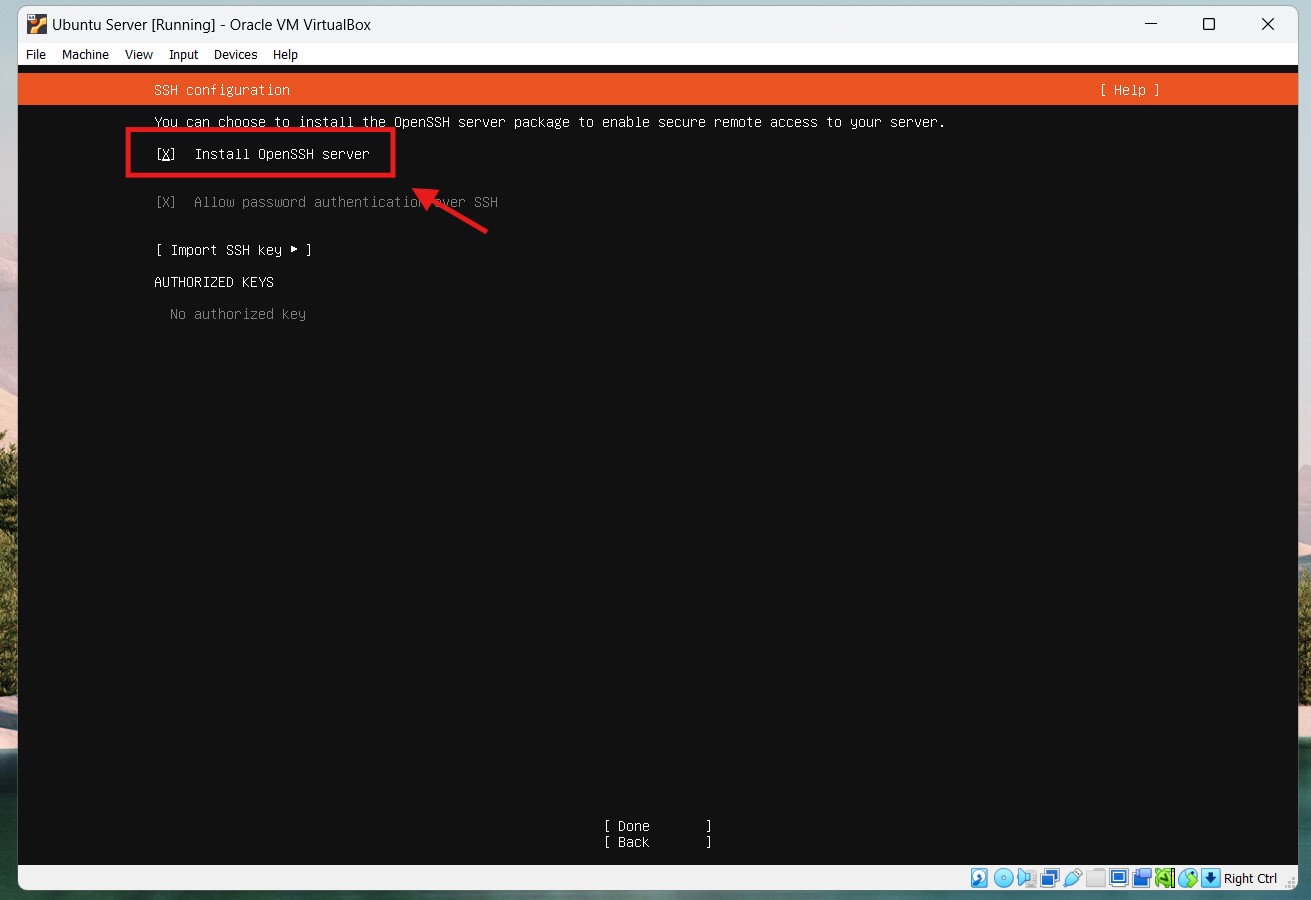
- SSH server: Select Install OpenSSH server to install the SSH service and allow remote connections to the server, then select Done.
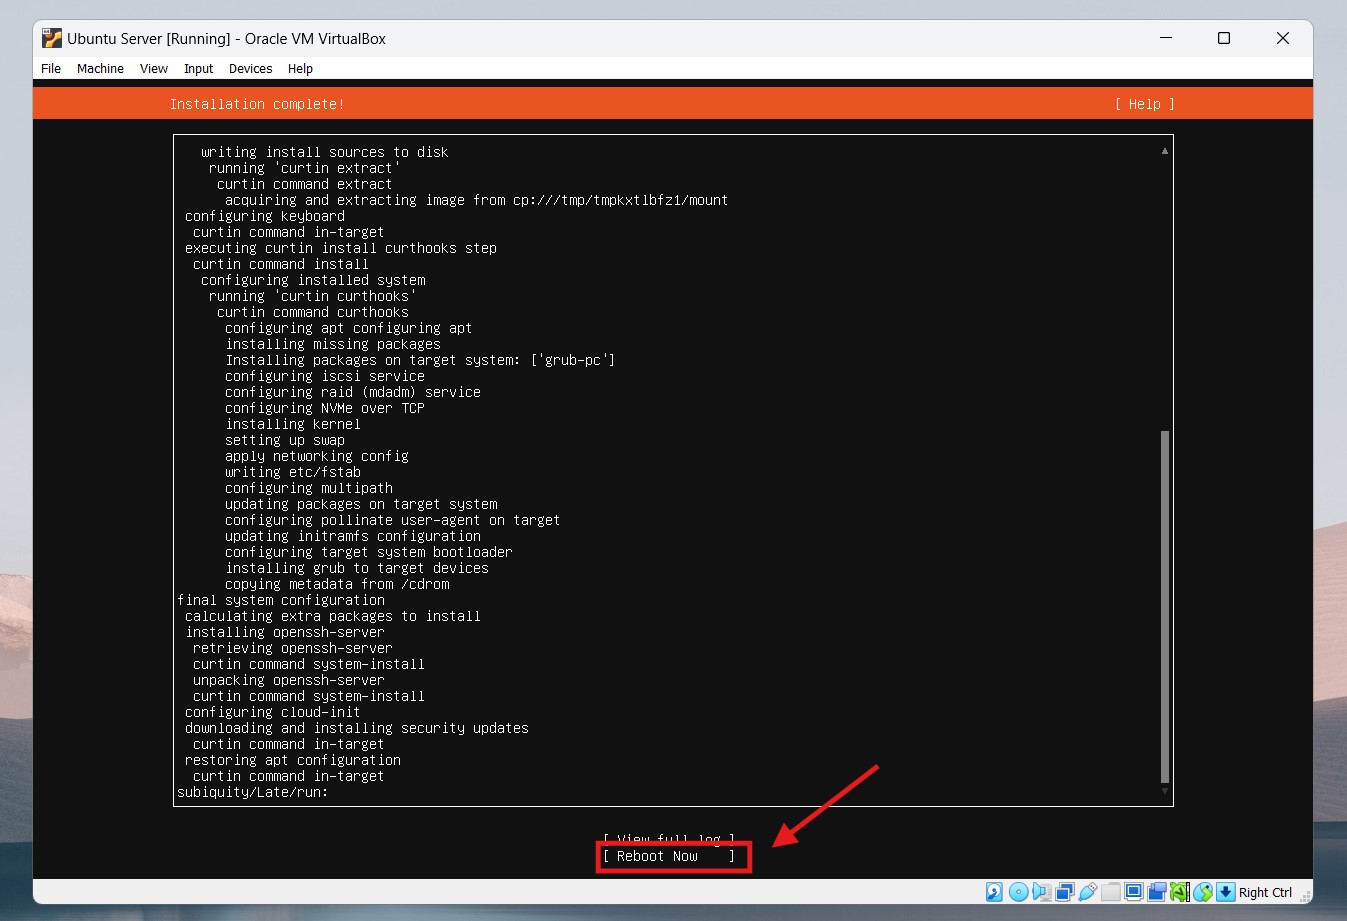
- Wait for the installation to complete: The system will automatically install the necessary packages and configure the system. This process may take a few minutes.
- Choose language: Select the language you want to use during the installation and press Enter. Here, we choose English.
Complete the installation and reboot:
- After the installation is complete, the system will prompt you to restart the virtual machine. Press Enter to restart.
- The virtual machine will reboot and prompt you to log in with the administrative account you created.
- After the installation is complete, the system will prompt you to restart the virtual machine. Press Enter to restart.
4. Initial Configuration for Ubuntu Server
After completing the installation, the virtual machine will reboot and prompt you to log in. Perform the following initial configurations:
Log in:
- Use the username and password you created during the installation to log in.
Update the system:
Open the terminal and run the following commands to update the system:
sudo apt update
sudo apt upgrade -y
Install essential packages:
Install basic packages for the system:
sudo apt install -y curl wget vim git
Configure the firewall:
Install and configure the firewall to protect the server:
sudo apt install -y ufw
sudo ufw allow OpenSSH
sudo ufw enable
5. Conclusion
You have successfully installed Ubuntu Server on VirtualBox. Now you can use this virtual machine to perform management and configuration tasks as needed. In the next articles, we will explore advanced configurations and install services on Ubuntu Server.
Notes
- Ensure you have a stable internet connection during the download and installation process.
- Always update the operating system and software packages to ensure security and stability.
- If you encounter any issues during the installation process, review the steps and refer to the Ubuntu or VirtualBox support documentation.
Good luck with your Ubuntu Server installation and configuration on VirtualBox!